How to Draw A Ferris Wheel. It’s always a lot of fun to visit a fair or carnival, as there are many exhibits, games, attractions, and rides to enjoy.
Also, check our unicorn printable coloring pages.
Some rides, like roller coasters, offer high-octane thrills and more relaxing, slower rides like a carousel.
A Ferris wheel falls somewhere between these two extremes as it is quiet and slow but offers the thrill of being lifted into the air.
Riding a Ferris wheel is a lot of fun, and it can even be entertaining to understand how to draw a Ferris wheel so you can design your own. This is the guide to use if you want to do this.
How to Draw A Ferris Wheel
Step 1
Before we focus on how to tauten a Ferris wheel, there are rare sketch instruments that you should have on hand to make it easier for you.
These tools include a ruler, a drawing compass, and a light pen. Don’t agonize if you don’t keep any of these handy, as we can create the design without them.
When you’re done, start tautening a tiny circle enveloped by a larger one. You can tighten these processes freehand or with a compass. Next, draw four small circles inside the outer circle for the screws holding it together.
You can then use your ruler to draw two diagonally descending columns from these circles.
This results in a three-tier base, as in our reference image. Finish by pulling more round bolts along the two columns, and then we can continue.
Step 2
In this second phase of drawing your Ferris wheel, you’ll benefit from using the drawing compass and light pen that we mentioned earlier.
Once you have these tools, use them to draw several circles centered on the two circles from step 1.
For now, we’ll use a pencil as we’ll draw the Ferris wheel seats on it later.
Make sure these circles stay within the pillars from the previous step. If you don’t have a compass, try to draw the circles slowly and carefully. It doesn’t matter if they aren’t perfect circles!
Step 3
We’ll use our rulers again for this step in our guide to drawing a Ferris wheel.
Using your ruler, draw several straight lines extending externally from the middle of the Ferris wheel to form a design that examines a speck like a spider web.
These will later be connected to the Ferris wheel seats.
Try replicating the lines as they appear in the reference image, and then we can add the posts in the next step.
Step 4
Now it’s time to add some seats to your Ferris wheel design. Each of these small fans looks identical, featuring a rounded bottom half with a flat roof above.
Each line you draw outward from the center of the Ferris wheel has one of these fans attached.
For now, we’re just drawing carts for the bottom half of the Ferris wheel.
We’ll add the rest in the next step, so let’s continue when you’re ready!
Step 5
Before we color this drawing, in the final step of this How To Draw A Ferris Wheel tutorial, we will finish the final elements.
First, we’ll resume what you created in the earlier step and add the remainder of the seating compartments.
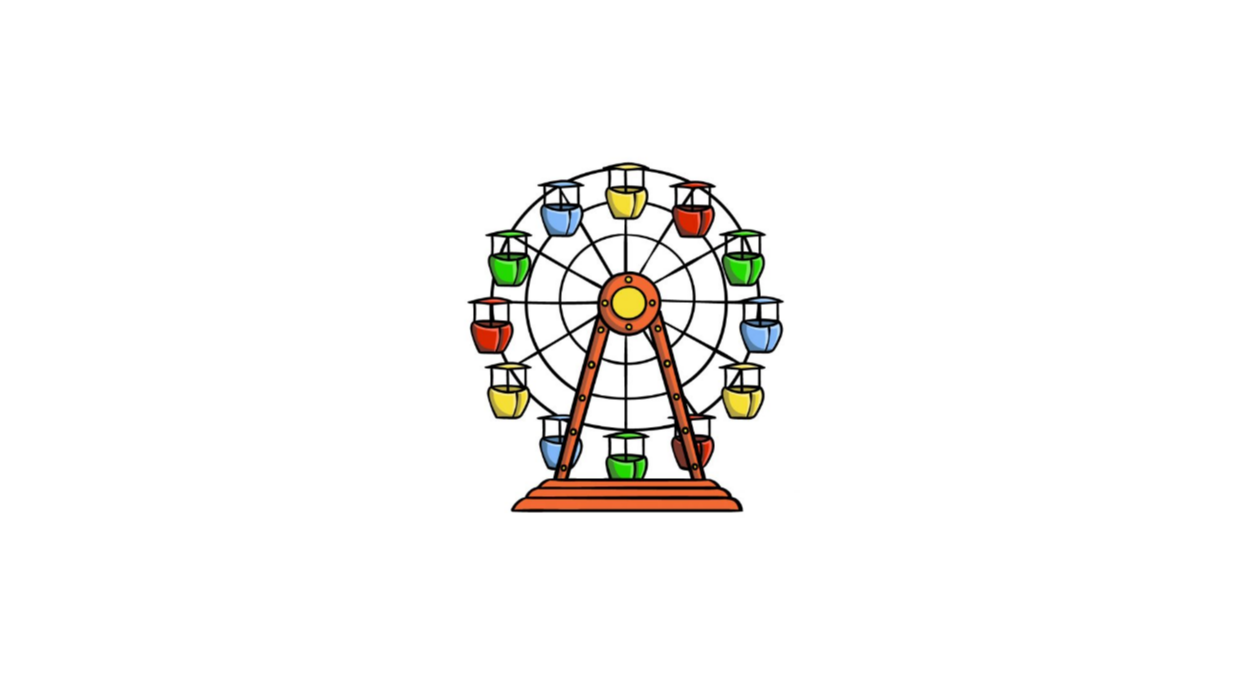
We’ll wrap up this guide by finishing the drawing of your Ferris wheel with some amazing colors! In our reference image, we used lots of bright colors to do justice to the carnival-like setting of this Ferris wheel.
These go over the rest of the lines to fill the top half of the Ferris wheel. Once you’ve added them, you can pen over the pencil lines for the center circles from earlier.
Then you can add more details and fun elements! You could draw other rides in the background or people sitting on the Ferris wheel.
Step 6
We’ll wrap up this guide by finishing the drawing of your Ferris wheel with some amazing colors! In our reference image, we used lots of bright colors to do justice to the carnival-like setting of this Ferris wheel.
This design allows you to have a lot of fun incorporating your favorite colors!
Some artistic media like acrylic paints and colored pencils would work great for this image as you can get bright and vibrant colors.
Your Ferris Wheel Drawing is Finished!
You May Like